Christian Kid's Music Crafts:
Let's Make A Joyful Noise!
These homemade Christian kid's music instruments are not just tons of fun. These musical crafts are here to help you instill a heart of thankfulness and praise in your children!
Praise and worship is a very important part of any Christian's spiritual walk. Often, it is during our special time praising the Lord that we feel His presence for the very first time.
Give your children that special experience through these Christian kid's music crafts. Since you probably have all of these materials right at home, you can do all of them for free!


Wondering why you should consider using these Christian kid's music crafts to teach your kids the heart of praise and worship?
- Watching you praise the Lord during the week sets a great example of a healthy relationship with God for your kids.
- When you make praising God fun, your children will grow up loving their time with the Lord, instead of resenting it as we are starting to see more and more.
- Crafts give you a chance to create something one-on-one with your children. If you have more than one small child, that is even better!
- All of these instruments can be saved and used over and over, adding a special boost to your kid's praise time.
- Creating a regular praise time in your home shows your child that you put a priority on worshiping God, and helps them to do the same!
Special Tip!
If you really want to get your kids exciting about praising God, check out this Kids Sing Praise Volume 1 Video (Ages 3-7) . For a great time in the Lord with your kids, break out this video, whip out your knew Musical Crafts, and throw a Praise Party for Jesus!
Try Making One of These Christian Kid's Music Crafts Today!
Paper Towel Roll Praise Banner * Coffee Can Praise DrumPaper Plate Tambourine * Shoe Box Guitar
Christian Kid's Music Craft #1
Make A Paper Towel Roll Praise
Banner!
Easy and Great for Smaller Kids!
Click Here for a Printable version of your Christian kid's musical crafts!

What You Will Need:
|
 |
Step One: Decorate!
|
 |
Step 2: Add Streamers! Now
it is time to make your paper towel roll into a praise banner!
|
 |
Final
Step: Finishing Touch!
|
Christian Kid's Music Craft #2
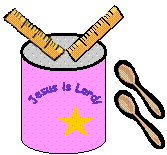
Make A Coffee Can Praise Drum!
Easy and Great for Smaller Kids!

What You Will Need
|
 |
Step One: Decorate!
|
 |
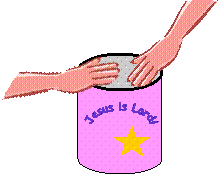
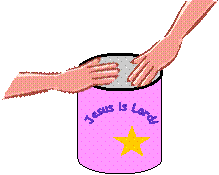
Step 2: Add Sound!
|
 |
Final Step: Finishing Touch!
|
Christian Kid's Music Craft #3
Make A Paper Plate Tambourine to
Praise God!

What You Will Need:
|
 |
Step One: Decorate!
|
 |
Step Two: Add Sound! Now
it is time to add your dried
beans!
Note:
If
you glue the plates, you will need to wait for them to dry
before
use. But, staples may not be safe for small children. |
 |
Final Step: Finishing Touch!
Use this same method to tie LOTS
of small ribbons all around your tambourine so that they wave as you
praise!
|
Christian Kid's Music Craft #4
Make A Shoe Box Guitar to Praise God
With!

What You Will Need:
|
 |
Step One: Decorate!
|
 |
Step Two: Add Sound!
|
 |
Final Step: Finishing Touch! Now it is time to add your finishing touches if you’d like. Consider gluing an empty paper towel roll to the side of your shoe box guitar.It can be a great handle!
|
You're In The Free
Children's Bible Activities
Section
 What's Hot! Free Online Jigsaw Puzzles |


